Add Domain to Resend
First, log in to your Resend Account and add a domain.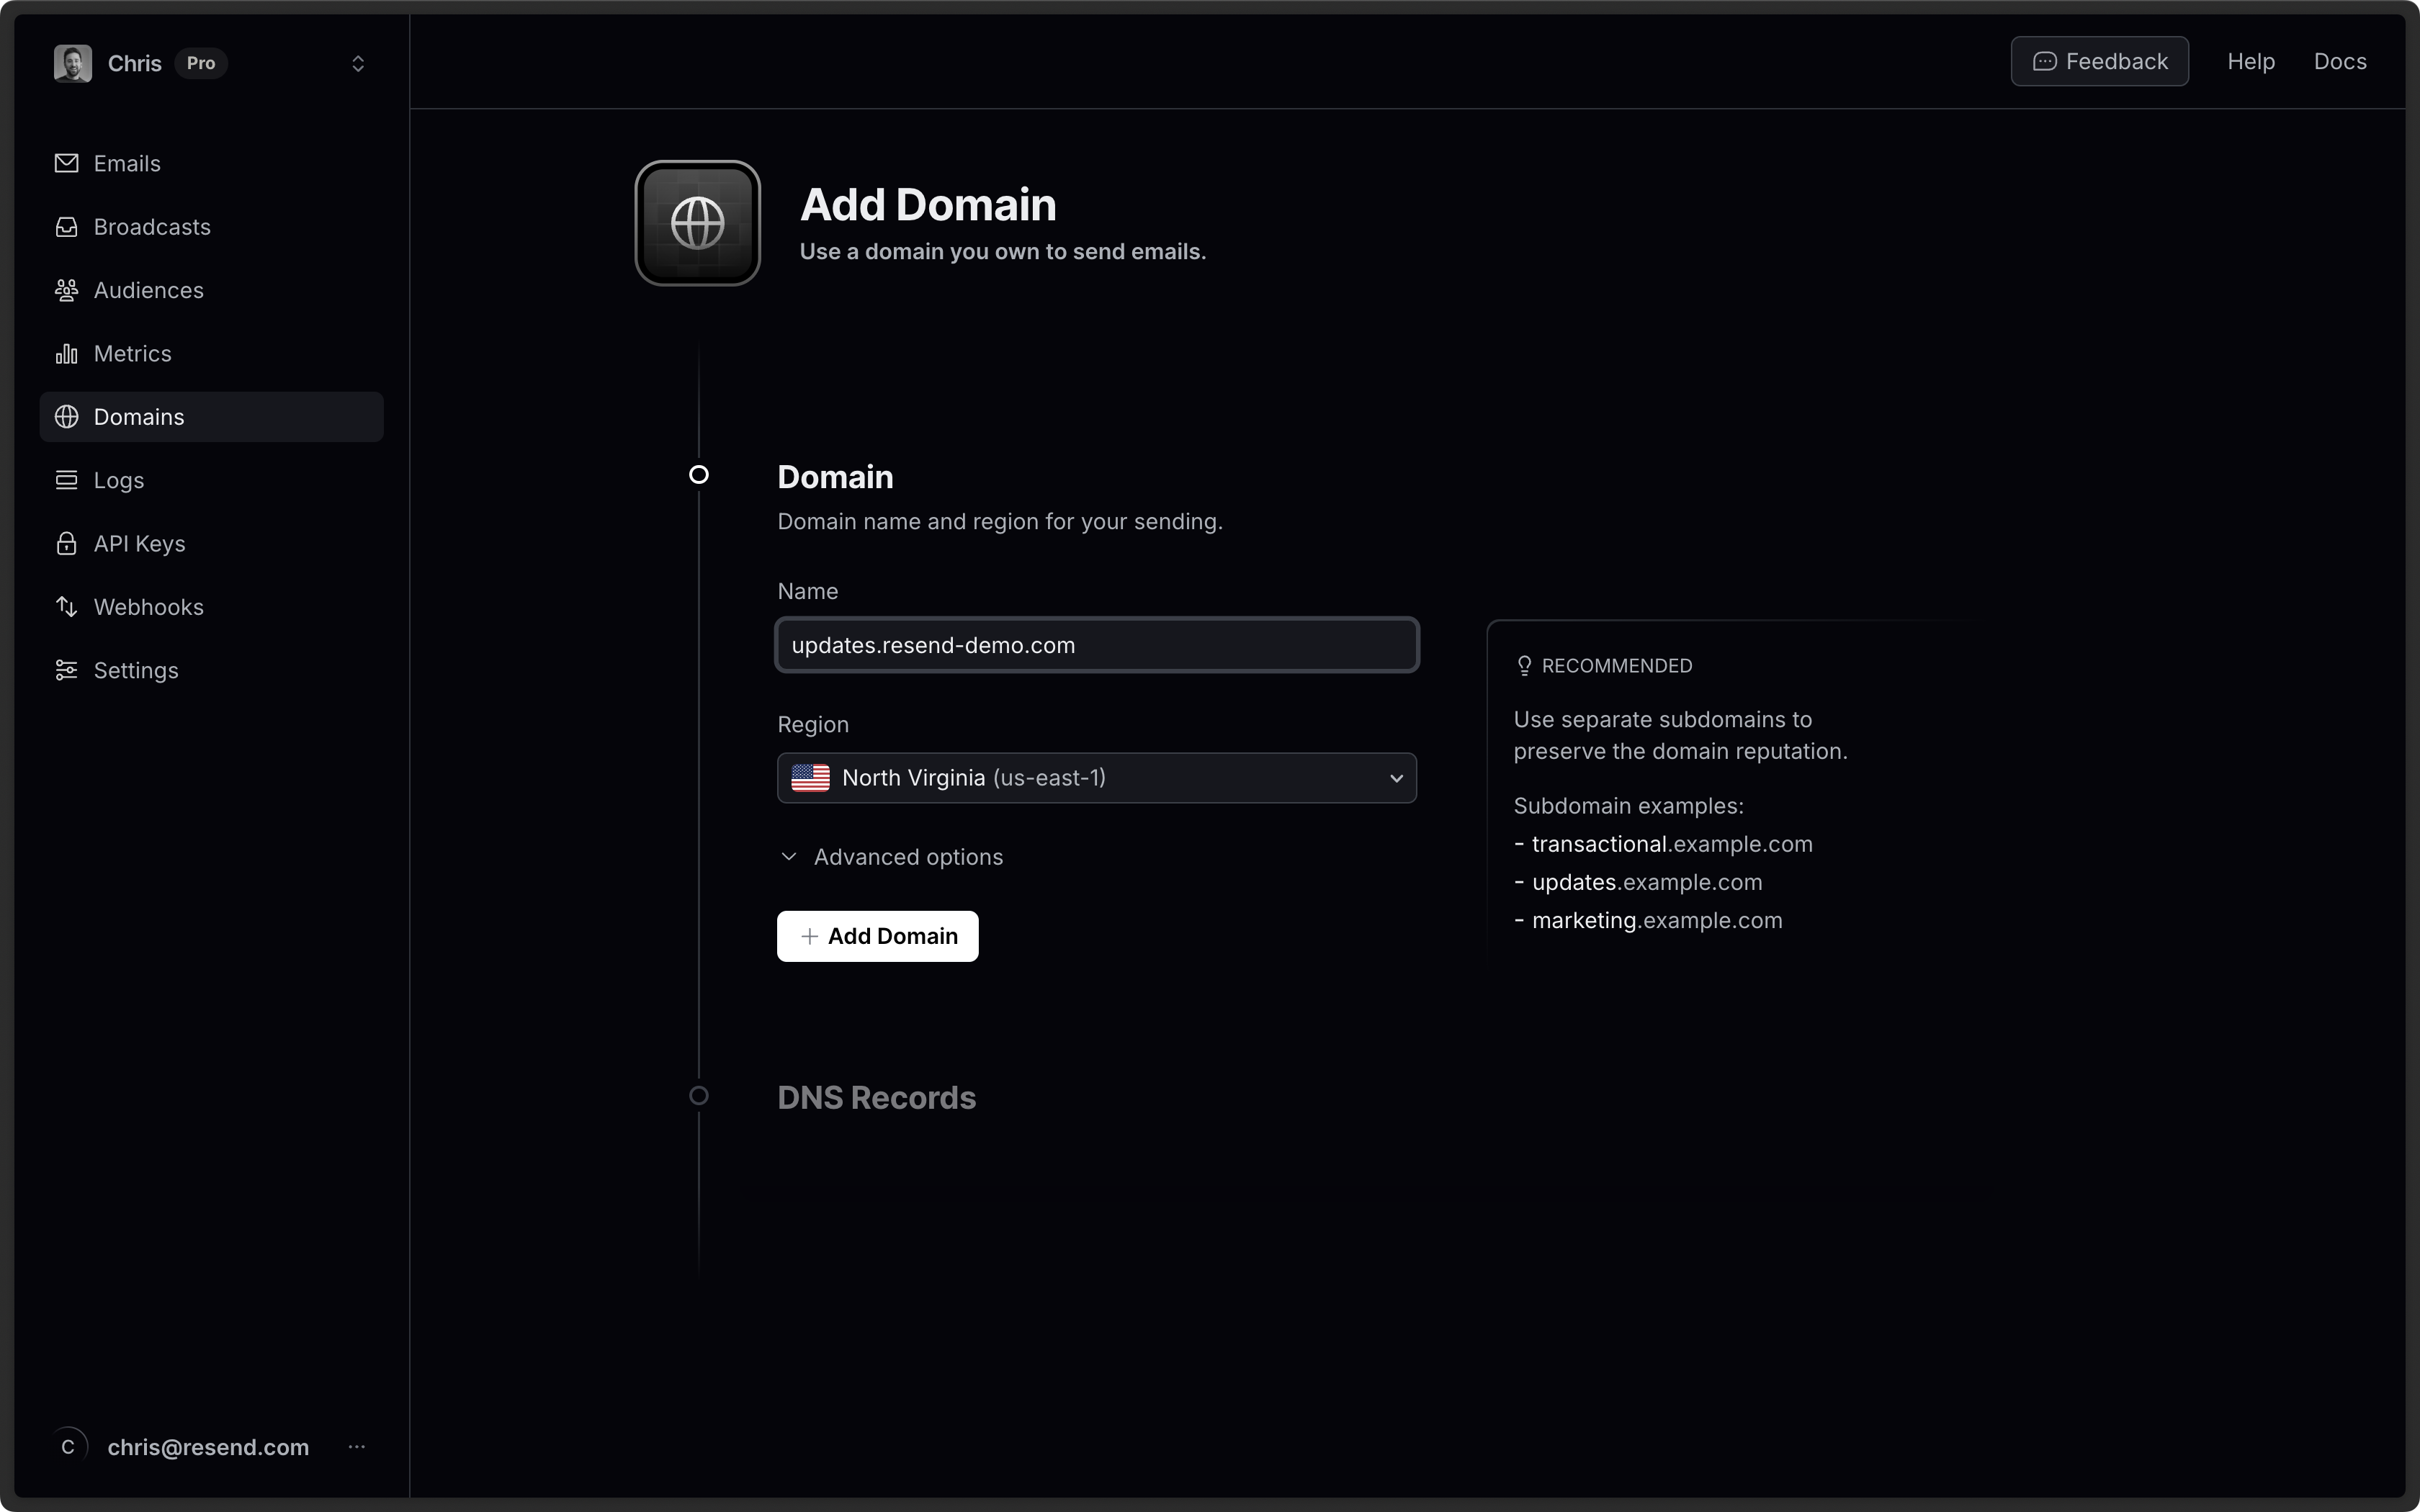
It is best practice to use a
subdomain
(updates.example.com) instead of the root domain (example.com). This allows
for proper reputation segmentation based on topics or purpose (e.g.
transactional and marketing).
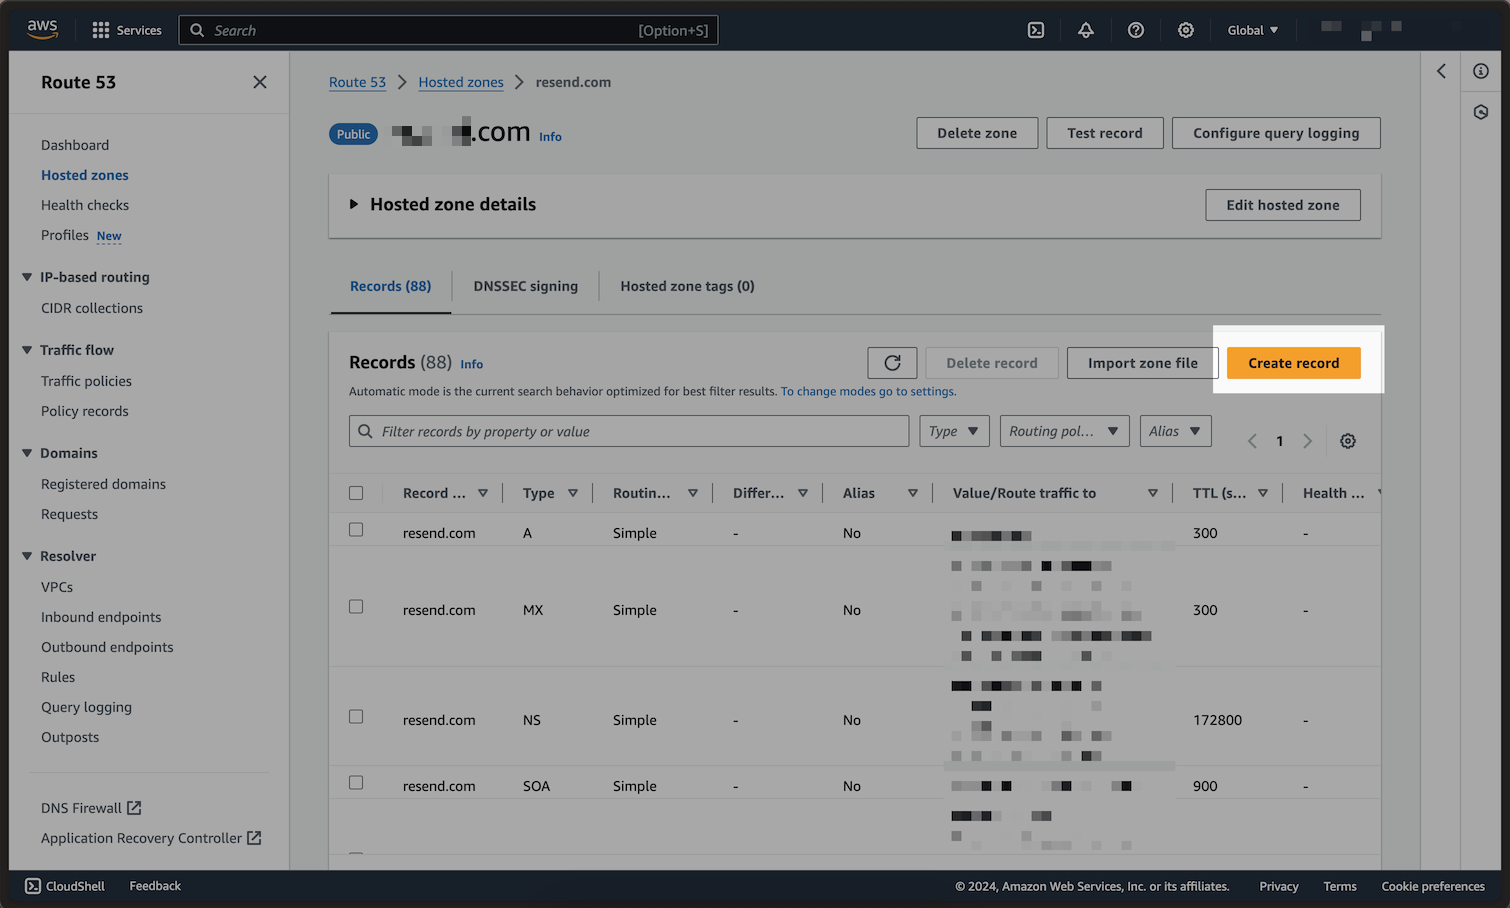
Log in to Route 53
Then, log in to your AWS Management Console, and open Route 53 console, then click on your domain name. From there, click onCreate Record.
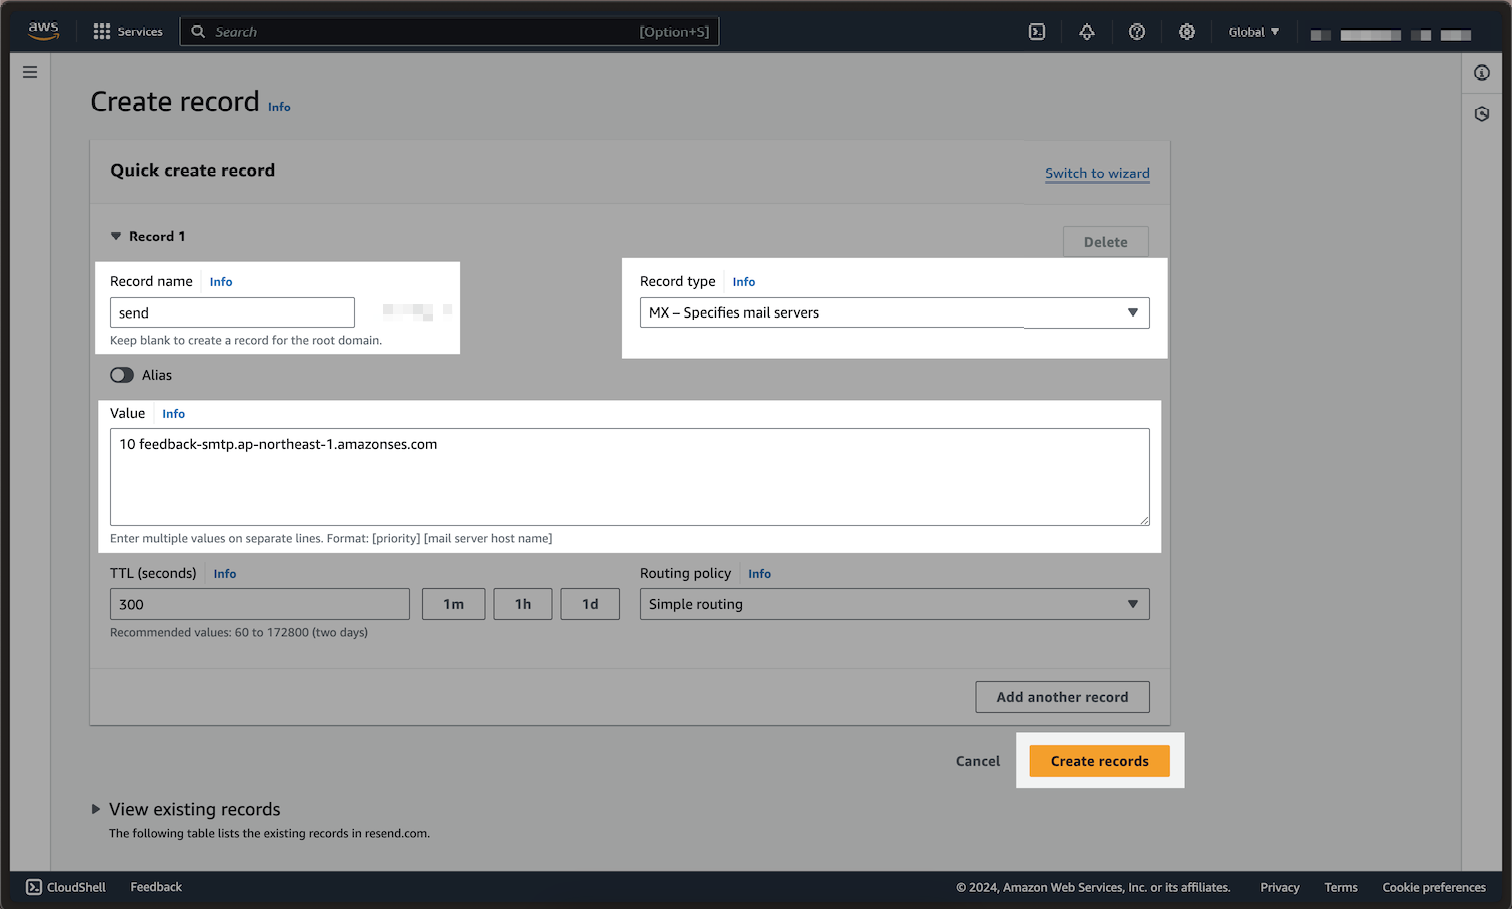
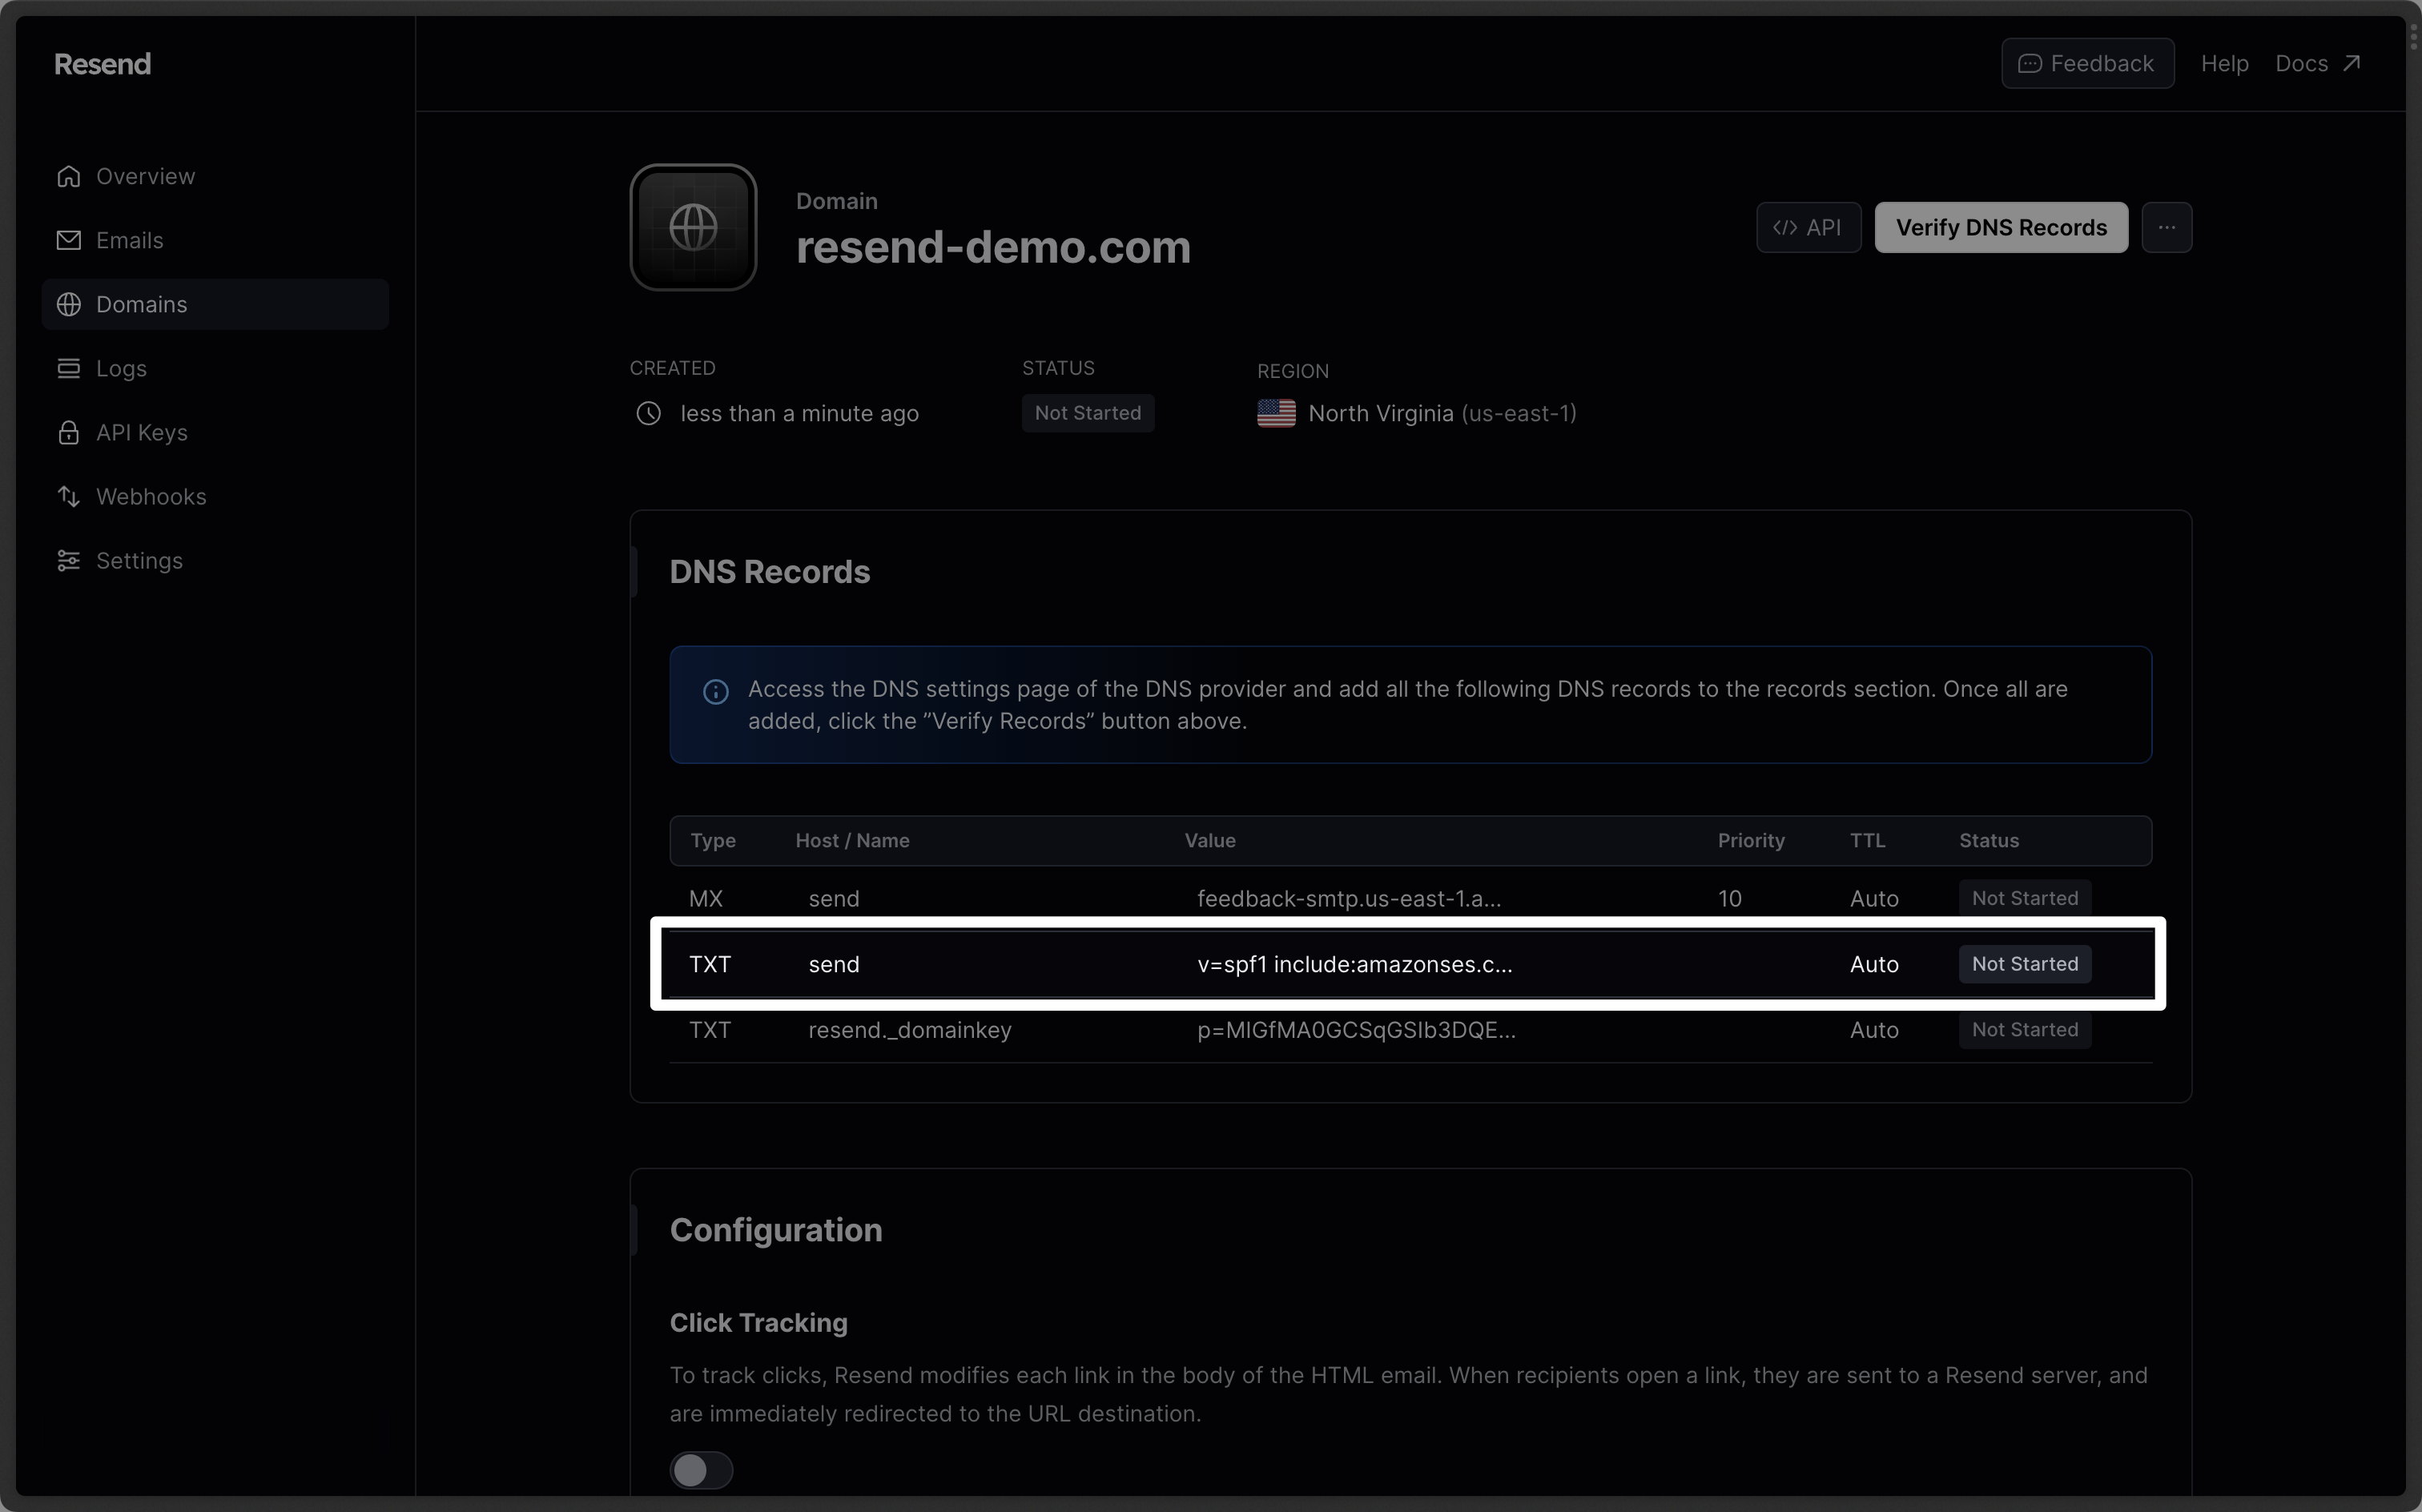
Add MX SPF Record
- Type in
sendfor theRecord name. - Select the
Record typedropdown, and chooseMX. - Copy the MX Value from your domain in Resend into the
Valuefield. - Be sure to include the
10in theValuefield, as seen in the screenshot.
Omit your domain from the record values in Resend when you paste. Instead of
send.example.com, paste only send (or send.subdomain if you’re using a
subdomain).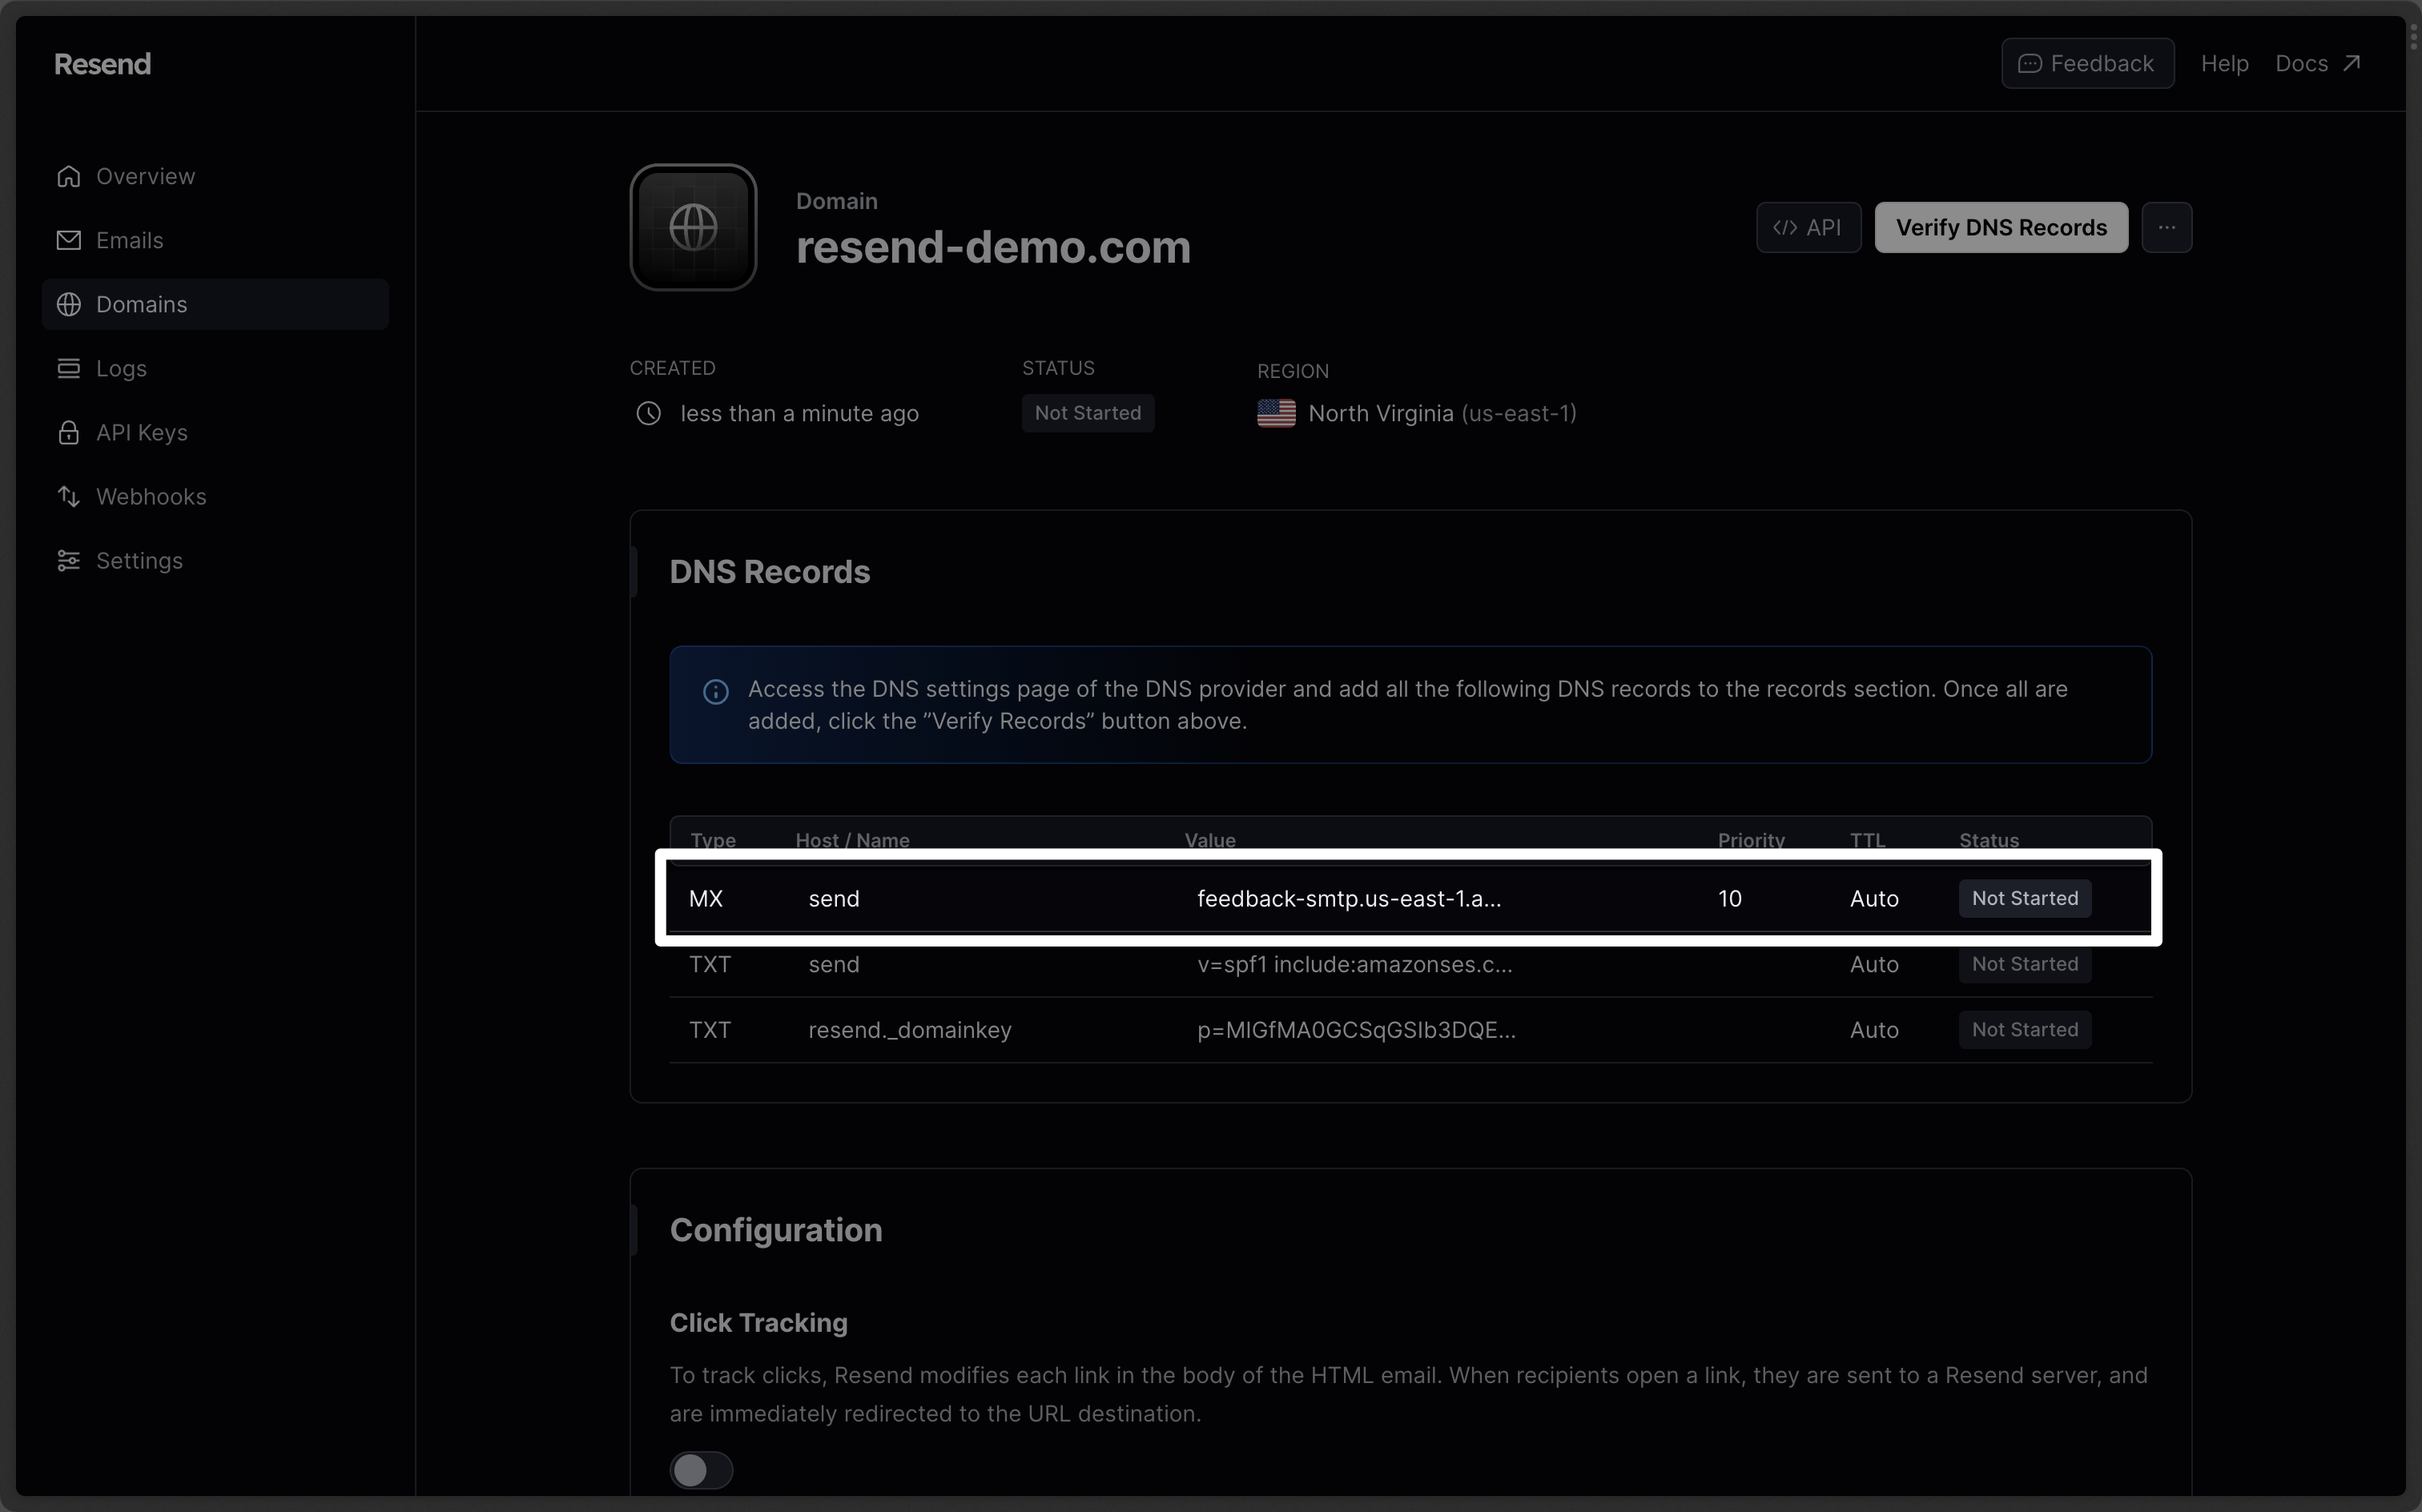
| Route 53 | Resend | Example Value |
|---|---|---|
| Record Type | Type | MX Record |
| Record name | Name | send |
| Value | Value & Priority | 10 feedback-smtp.us-east-1.amazonses.com |
| TTL | - | Use Route 53 Default (300) |
| Routing policy | - | Simple routing |
Route 53 does not label the
priority column, and you will need to add this
in to the Value section, as shown in the screenshot. Do not use the same
priority for multiple records. If Priority 10 is already in use, try a
number slightly higher like 11 or 12.Add TXT SPF Record
In the same section, chooseAdd another record:
- Type in
sendfor theRecord name. - Click the
Record typedropdown. - Select the
Record typedropdown, and chooseTXT. - Copy TXT Value from your domain in Resend into the
Valuefield.
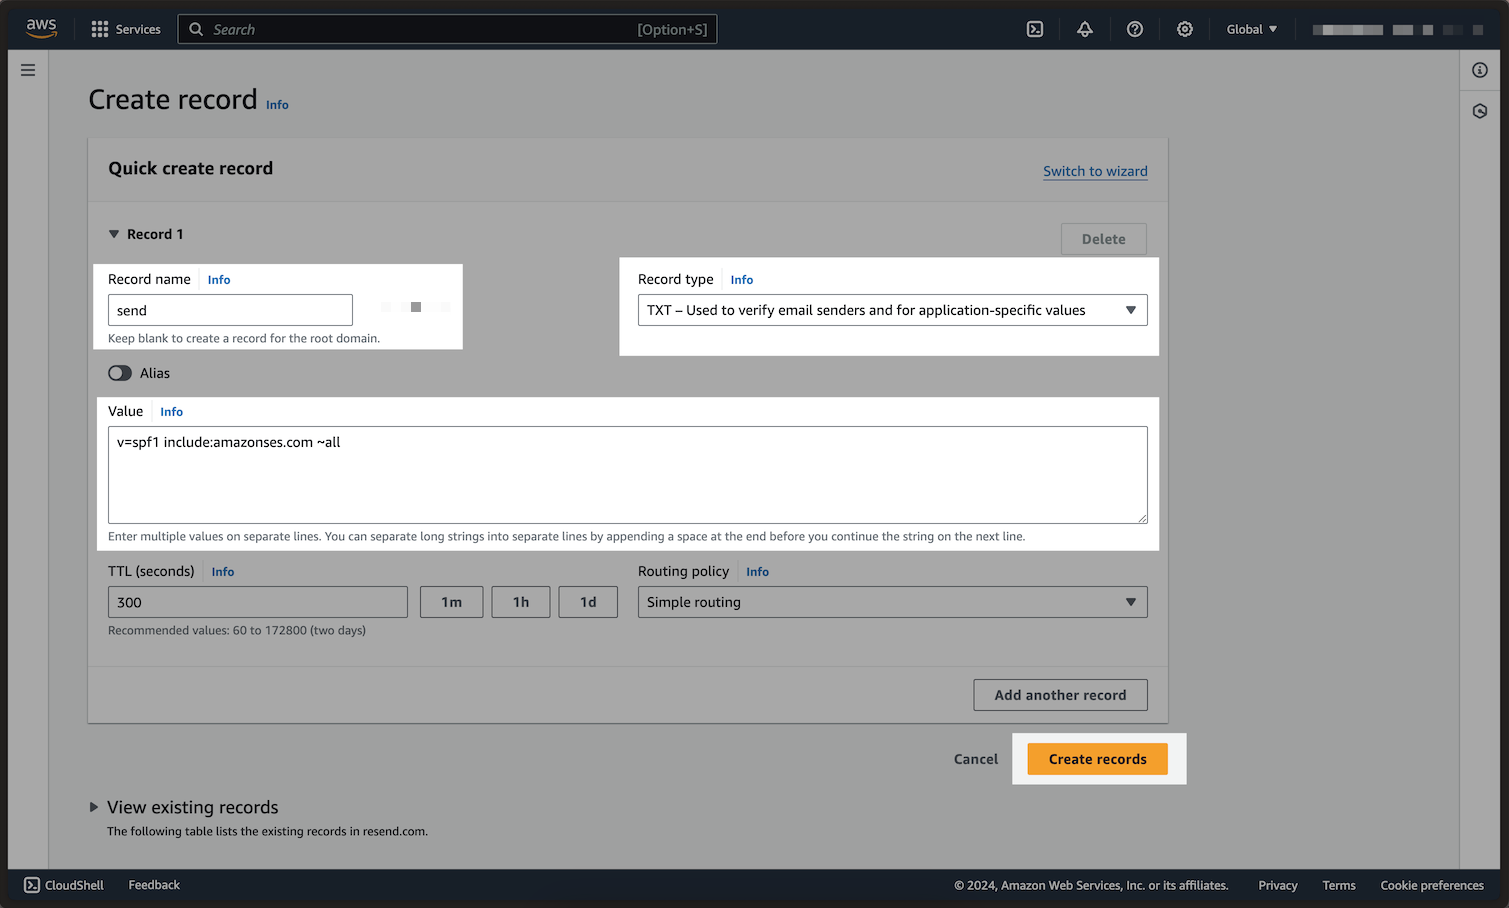
| Route 53 | Resend | Example Value |
|---|---|---|
| Record type | Type | TXT Record |
| Record name | Name | send |
| Value | Value | "v=spf1 include:amazonses.com ~all" |
| TTL | - | Use Route 53 Default (300) |
| Routing policy | - | Simple routing |
Omit your domain from the record values in Resend when you paste. Instead of
send.example.com, paste only send (or send.subdomain if you’re using a
subdomain).Add TXT DKIM Records
In the same section, chooseAdd another record:
- Type in
resend._domainkeyfor the theRecord name. - Change the
Record TypetoTXT. - Copy the TXT Value value from your domain in Resend to the
Valuetext box. - Click on
Create Records.
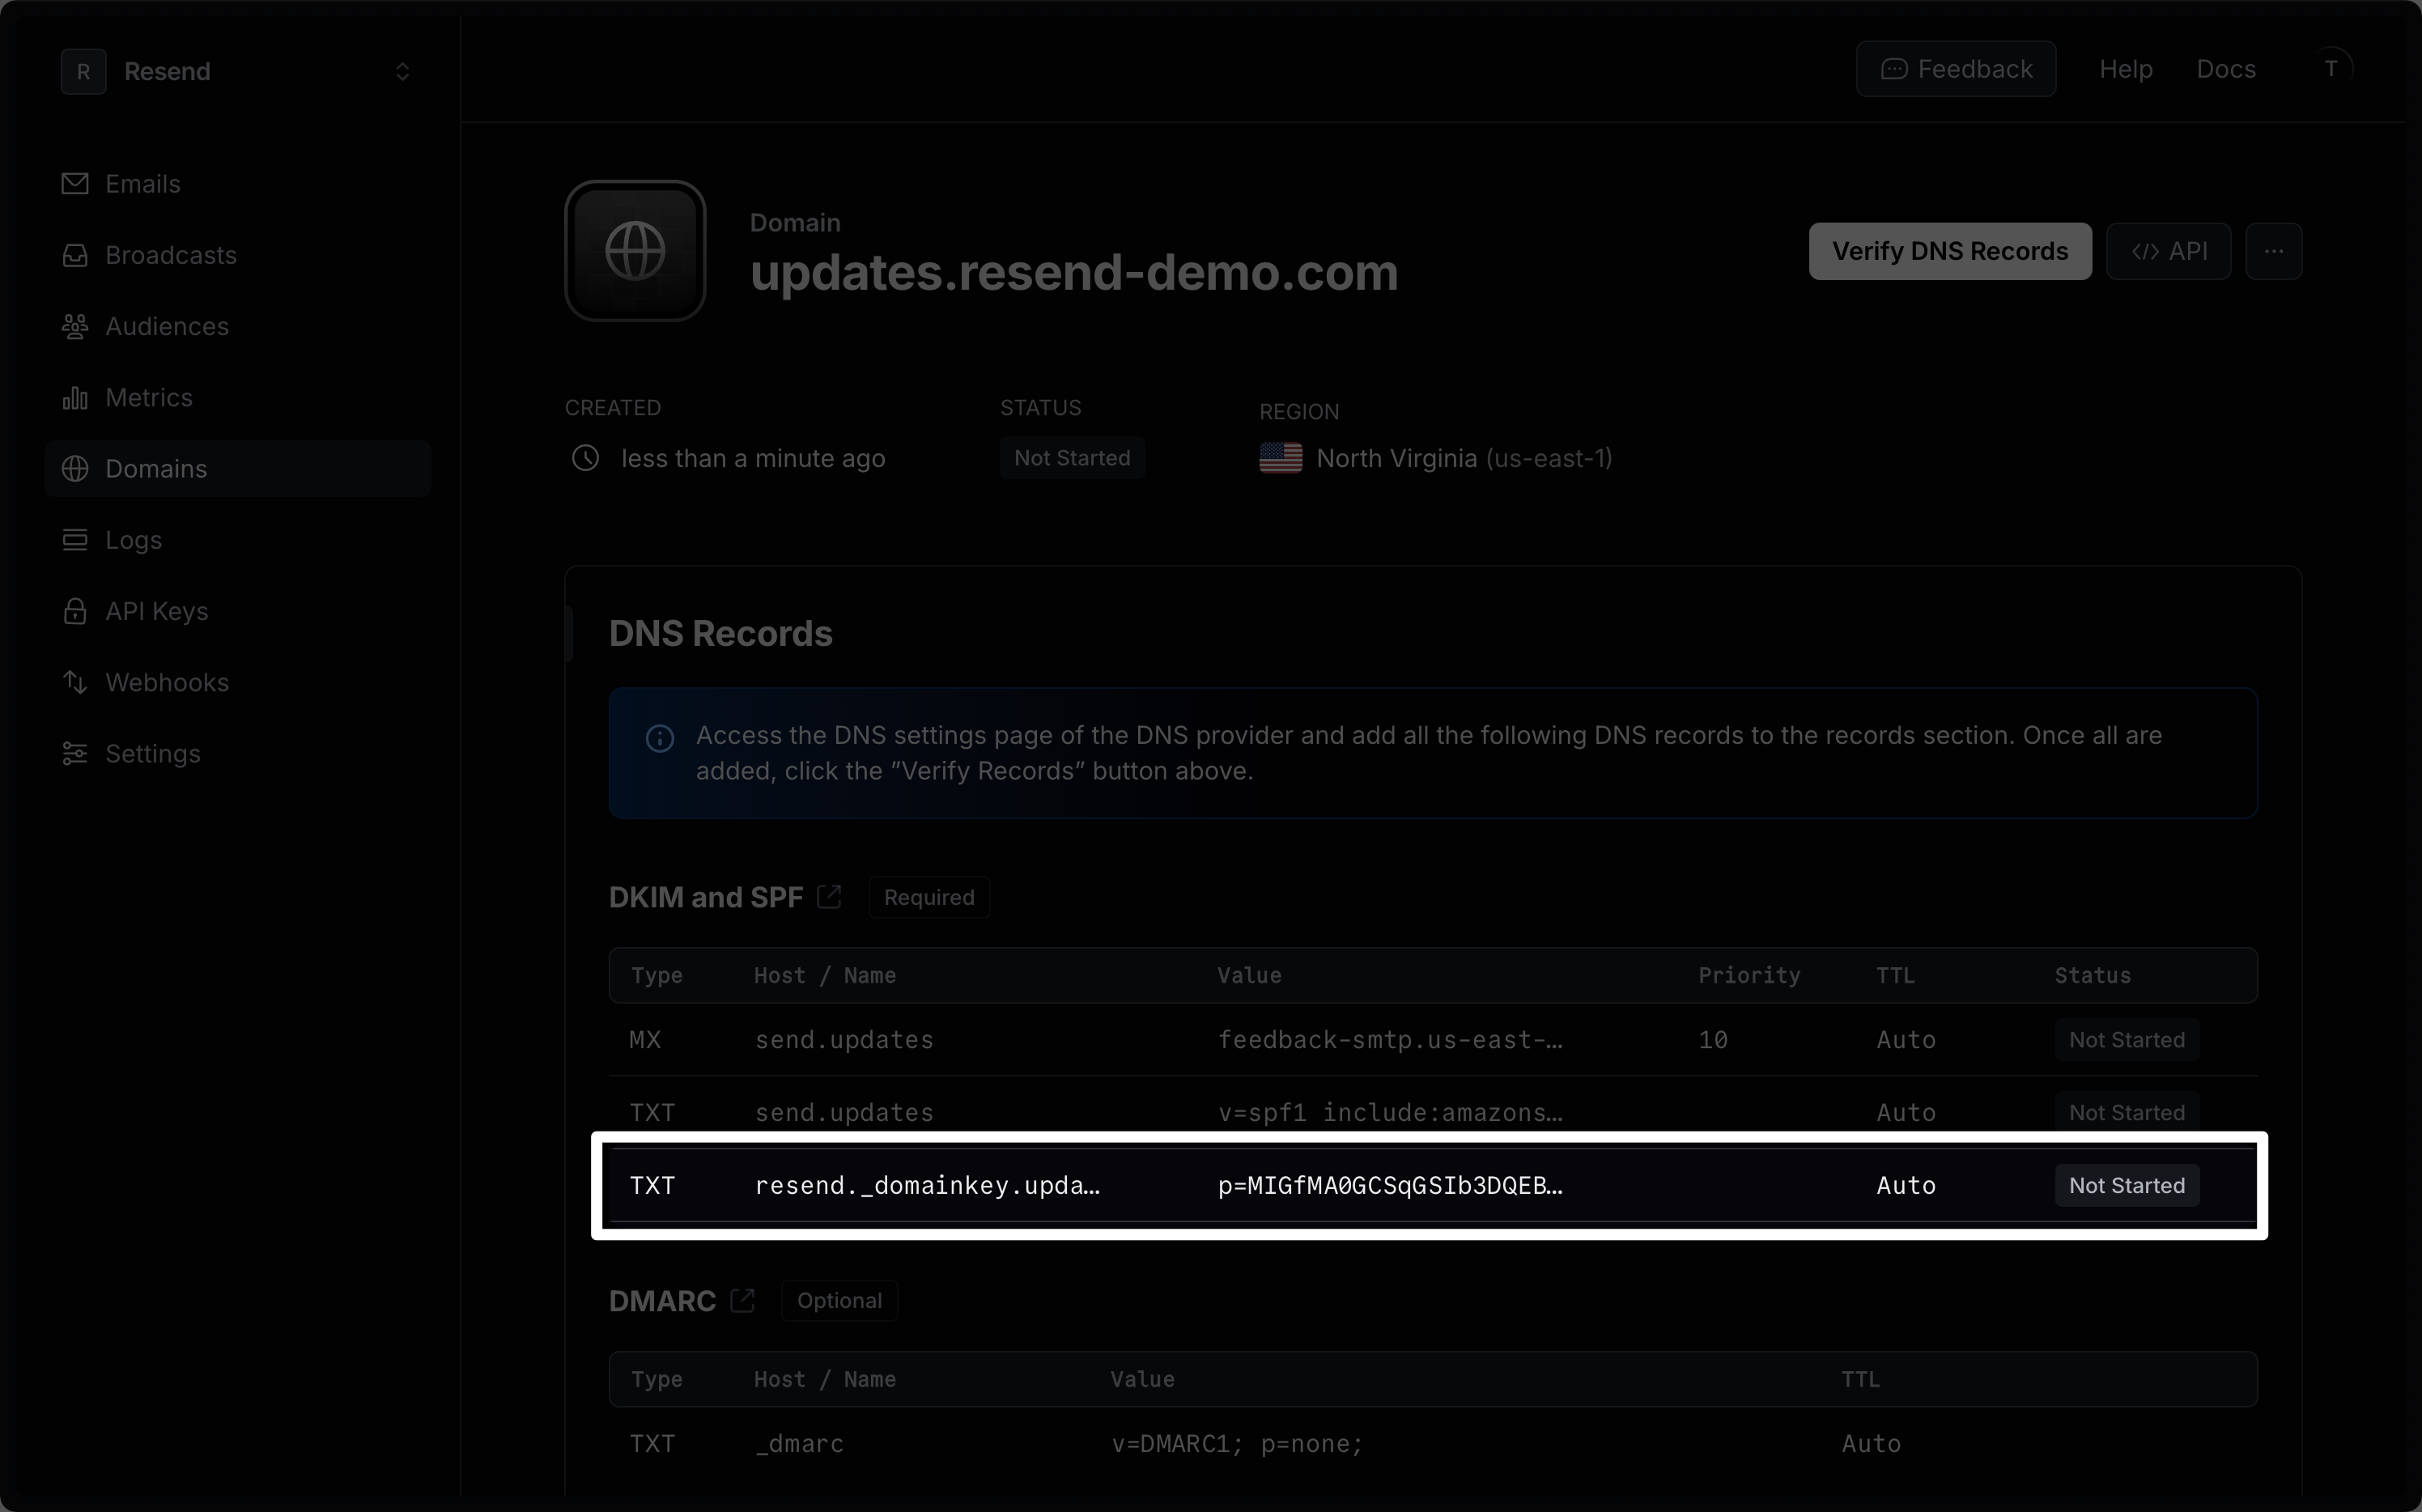
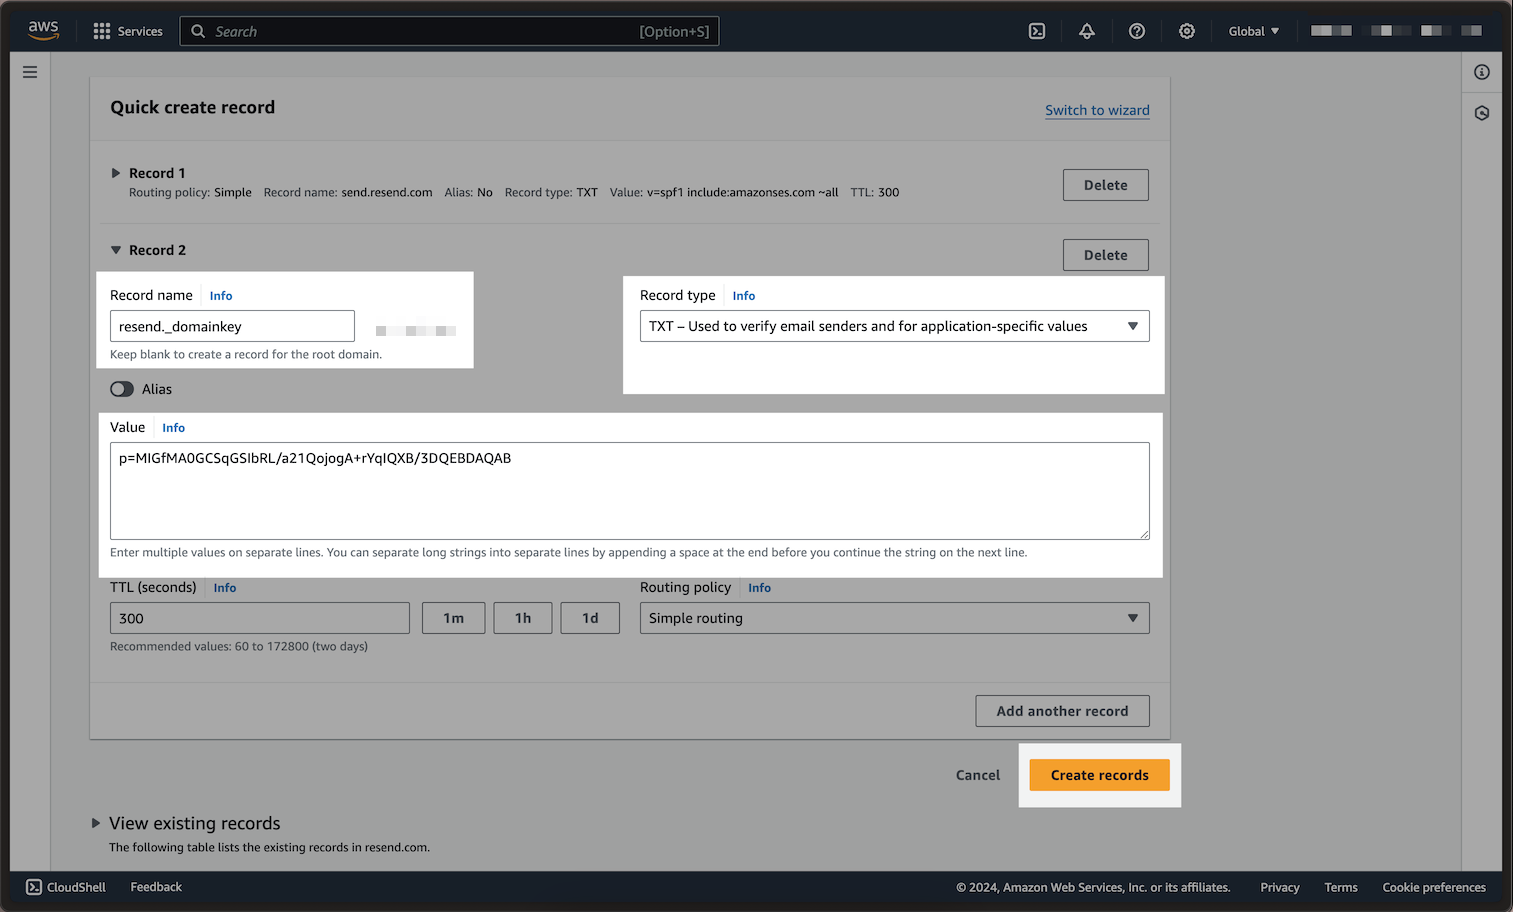
| Route 53 | Resend | Example Value |
|---|---|---|
| Record type | Type | TXT Record |
| Record name | Name | resend._domainkey |
| Value | Value | p=example_demain_key_value |
| TTL | - | Use Route 53 Default (300) |
| Routing policy | - | Simple routing |
Omit your domain from the record values in Resend when you paste. Instead of
resend._domainkey.example.com, paste only resend._domainkey (or
resend._domainkey.subdomain if you’re using a subdomain).Complete Verification
Now click Verify DNS Records on your Domain in Resend. It may take up to 5 hours to complete the verification process (often much faster).Troubleshooting
If your domain is not successfully verified, these are some common troubleshooting methods.Resend shows my domain verification failed.
Resend shows my domain verification failed.
Review the records you added to Route 53 to rule out copy and paste errors.
It has been longer than 72 hours and my domain is still Pending.
It has been longer than 72 hours and my domain is still Pending.